Disclosure: This site may contain affiliate links. If you purchase through these links, we may earn a commission at no additional cost to you.
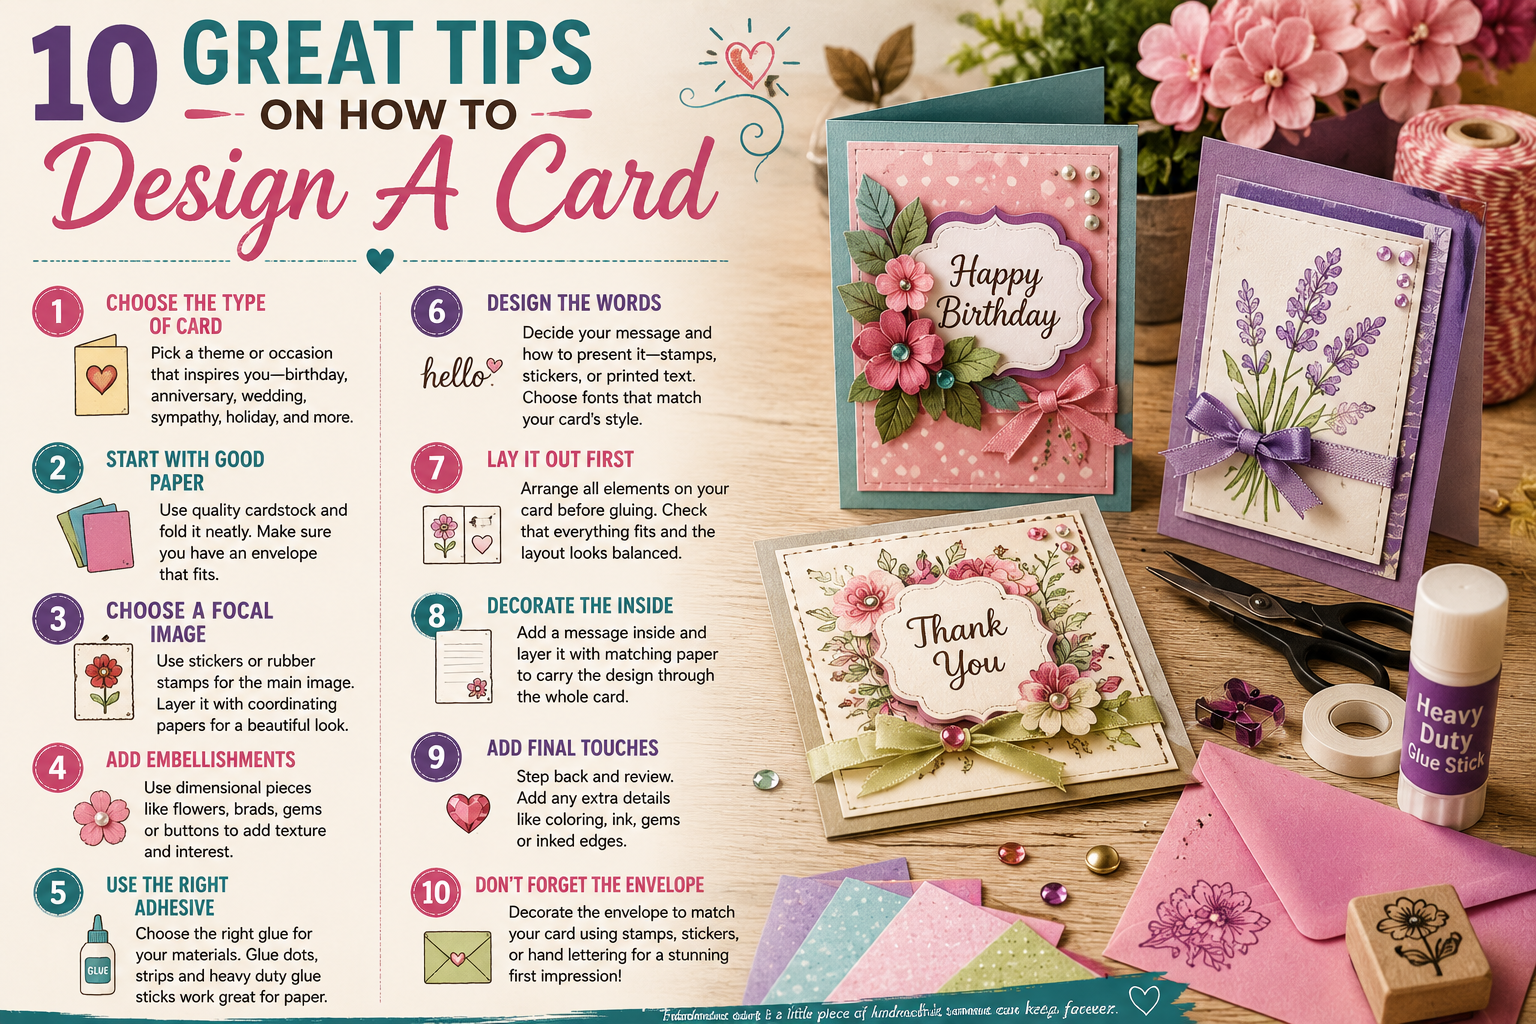
10 Great Tips On How To Design A Beautiful Handmade Cards
Handmade cards have a charm that store-bought cards rarely match. A thoughtfully designed card carries personality, creativity, and emotional value that instantly feels more meaningful to the person receiving it. Whether you are creating birthday cards, holiday cards, wedding invitations, thank-you notes, or sympathy cards, designing your own allows you to craft something truly personal and memorable.
The beauty of handmade card design is that it does not require expensive equipment or professional artistic skills to get started. With a few basic materials, a little creativity, and attention to detail, anyone can create beautiful custom cards that stand out.
Card making has also become increasingly popular because it combines creativity with relaxation. For many people, designing cards feels both artistic and therapeutic. The process allows you to experiment with colors, textures, paper styles, embellishments, and typography while producing something tangible and meaningful.
If you are new to card making or want to improve your designs, these ten practical tips will help you create cards that look polished, creative, and professionally crafted.
1. Choose the Right Type of Card
The first step in designing a successful card is deciding what type of card you want to create.
Different occasions naturally inspire different styles, colors, and emotional tones. A playful birthday card for a child will look very different from a formal wedding card or a heartfelt sympathy card.
Popular card categories include:
-
Birthday cards
-
Anniversary cards
-
Wedding cards
-
Holiday cards
-
Get well cards
-
Sympathy cards
-
Baby shower cards
-
Thank-you cards
-
Graduation cards
-
Valentine’s Day cards
Choosing the purpose of the card early helps guide the rest of the design process, including color palettes, materials, fonts, and decorative elements.
Think about the personality of the recipient as well. A handmade card feels even more special when it reflects the interests, style, or emotions of the person receiving it.
2. Start with Quality Paper and Materials
Paper is the foundation of every card design.
Using quality materials instantly improves the appearance and durability of handmade cards. Thin or flimsy paper can make even creative designs feel unfinished, while sturdy cardstock creates a cleaner, more professional result.
Cardstock is one of the most popular choices because it:
-
folds cleanly
-
supports layered designs
-
handles glue and embellishments well
-
provides durability
-
comes in many colors and textures
Pre-folded card blanks are convenient for beginners, but many card makers prefer cutting and folding their own designs for greater customization.
A bone folder is especially useful for creating crisp, smooth folds without damaging the paper. Clean folds immediately make handmade cards look more polished.
It is also important to choose the correct envelope size before finalizing your card dimensions. Designing a beautiful card only to discover it will not fit inside an envelope can be frustrating.
3. Create a Strong Focal Point
Every effective card design needs a visual centerpiece.
This focal point is usually the first thing people notice when they look at the card. It might be:
-
a stamped image
-
a decorative sticker
-
an illustration
-
a photograph
-
layered paper art
-
calligraphy
-
a dimensional embellishment
Rubber stamps remain especially popular in handmade card design because they allow endless customization through color combinations and artistic techniques.
Experimenting with:
-
ink colors
-
layered stamping
-
textured paper
-
patterned backgrounds
-
embossed effects
can dramatically improve the visual depth of the card.
Layering is another powerful technique. Placing stamped images or decorative pieces on contrasting paper helps create dimension and visual interest.
The goal is to create balance without overcrowding the design.
4. Use Embellishments Carefully
Embellishments can transform a simple card into something eye-catching and unique.
Popular embellishments include:
-
ribbons
-
buttons
-
beads
-
sequins
-
metallic accents
-
dimensional flowers
-
brads
-
charms
-
lace
-
decorative fibers
These elements add texture, depth, and personality to a design.
However, restraint matters.
One of the biggest mistakes beginners make is adding too many decorative elements. Overloading a card with embellishments can make the design feel cluttered and distracting.
Instead, use embellishments strategically to enhance the focal point and support the overall style of the card.
Sometimes a single elegant ribbon or metallic accent creates more impact than excessive decoration.
5. Choose the Right Adhesive
A beautiful card can quickly fall apart if the wrong adhesive is used.
Different materials require different gluing methods. Heavy embellishments often need stronger adhesives, while delicate paper layers require lighter, smoother options that will not wrinkle the cardstock.
Popular adhesive options include:
-
glue sticks
-
double-sided tape
-
glue dots
-
adhesive strips
-
liquid craft glue
-
hot glue guns
Glue guns work well for heavier decorative elements but may damage thin paper if applied carelessly.
For paper layering, many card makers prefer heavy-duty glue sticks or adhesive strips because they dry cleanly without leaving visible residue or warping the paper.
Testing adhesives on scrap materials first can help avoid mistakes on finished designs.
6. Design the Typography and Greeting Carefully
Words are just as important as visuals in card design.
The message inside the card often carries the emotional heart of the project, so the typography and wording should match the tone of the occasion.
For example:
-
playful fonts work well for children’s birthday cards
-
elegant script fonts suit weddings and anniversaries
-
clean modern typography complements minimalist designs
-
handwritten lettering adds warmth and personality
You can create greetings using:
-
stamps
-
stickers
-
printed text
-
hand lettering
-
calligraphy
-
digital design software
Placement also matters. Some cards place the greeting prominently on the front, while others reserve the full message for the inside.
A thoughtful message paired with attractive typography creates a stronger emotional connection.
7. Test the Layout Before Gluing
Before attaching anything permanently, lay out all design elements first.
This step helps ensure:
-
proper spacing
-
visual balance
-
clean alignment
-
correct proportions
-
cohesive design flow
It is much easier to rearrange loose elements than to repair mistakes after everything is glued down.
Pay attention to:
-
symmetry
-
color balance
-
empty space
-
layering depth
-
readability
Sometimes small adjustments make a huge difference in the final appearance.
Taking a quick photo of the layout before gluing can also help you evaluate the composition more objectively.
8. Don’t Ignore the Inside of the Card
Many beginners focus entirely on the front design while neglecting the inside.
The interior of the card should feel connected to the overall design rather than appearing blank or unfinished.
Simple ways to improve the inside include:
-
layered paper inserts
-
matching borders
-
decorative corners
-
stamped accents
-
coordinated colors
-
handwritten notes
Keeping the interior visually consistent with the front creates a more complete and professional-looking finished product.
Even subtle interior details can elevate the overall design significantly.
9. Add Finishing Details
The smallest details often have the biggest impact.
Once the main design is complete, step back and evaluate whether the card needs any final touches.
Small finishing elements might include:
-
colored edges
-
hand-drawn accents
-
shading
-
watercolor highlights
-
metallic ink
-
textured chalks
-
embossed details
-
tiny gems or pearls
At this stage, avoid overworking the design. The goal is enhancement, not clutter.
Sometimes the perfect finishing touch is simply adding a little more contrast or visual texture.
10. Design the Envelope Too
A handmade card feels even more special when the envelope matches.
Decorating the envelope creates anticipation before the card is even opened.
Simple envelope design ideas include:
-
matching stamps
-
stickers
-
calligraphy
-
colored borders
-
wax seals
-
ribbon accents
-
decorative liners
-
coordinating colors
Even minimal envelope decoration can make the entire presentation feel more thoughtful and polished.
The envelope serves as the introduction to the card itself.
Handmade Cards Create Lasting Impressions
One of the reasons handmade cards remain so meaningful is because they represent time, thought, and effort. In a digital world dominated by text messages and emails, receiving a handcrafted card feels personal in a way that mass-produced communication rarely does.
Handmade cards also allow unlimited creative freedom. Every project becomes an opportunity to experiment with:
-
color combinations
-
textures
-
layering
-
typography
-
artistic techniques
-
decorative styles
No two cards ever need to look exactly alike.
Whether you are creating cards as a hobby, for gifts, for small business sales, or simply for creative relaxation, card making offers a rewarding way to combine art and personal expression.
Final Thoughts
Designing handmade cards is both creative and deeply personal. With quality materials, thoughtful layouts, strong focal points, and attention to detail, even beginners can create cards that feel elegant, memorable, and professionally crafted.
The best card designs are not necessarily the most complicated. Often, the most effective cards combine simplicity, balance, and heartfelt creativity in ways that connect emotionally with the recipient.
The beauty of handmade card design lies in its individuality. Every card becomes a one-of-a-kind expression of creativity and care.
Recommended Resources
👉 CorelDRAW - professional graphic design software.
👉 Wondershare - creative software solutions.