Disclosure: This site may contain affiliate links. If you purchase through these links, we may earn a commission at no additional cost to you.
Brake Chamber Replacement & Caging Safety: A Road Tech’s Survival Guide
The Most Dangerous Can Under a Truck
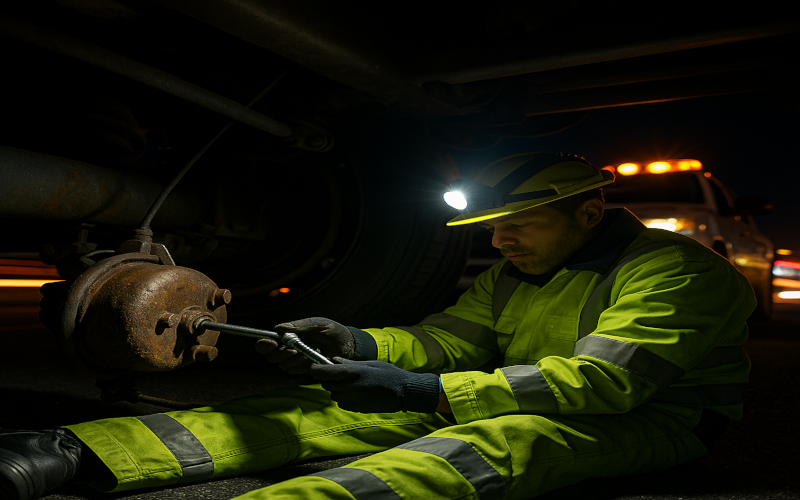
Imagine this: It’s 2 a.m. on a lonely stretch of interstate. A tractor-trailer is stuck on the shoulder, hazards flashing in the dark. The driver waves you over, his rig won’t move. You crawl underneath with your flashlight and spot the problem: a cracked, rusty brake chamber, pushrod jammed.
The driver says, “It’s just a chamber. Can you pop it off real quick?”
Here’s what he doesn’t realize: that chamber isn’t just a can. It’s a steel grenade. Inside, a spring wound with thousands of pounds of force is ready to explode if you open it wrong. One careless move, and the clamp ring holding it together could rocket off, hitting you like a bullet.
This is why every roadside technician, whether seasoned or green, must respect brake chambers. And it’s why understanding caging, the process of safely neutralizing that spring before repair can mean the difference between going home safe and not going home at all.
Air Brakes 101: What the Rookie Needs to Know
Before diving into the dangers, let’s back up. Trucks don’t use the same braking system as cars. Passenger vehicles rely on hydraulic fluid to move pistons and apply brakes. Trucks, on the other hand, use air brakes because they’re safer and more reliable for massive loads.
Here’s how it works, in simple terms:
-
Air Compressor: Powered by the engine, it pumps compressed air into storage tanks.
-
Air Tanks: These act like batteries, storing pressurized air until it’s needed.
-
Brake Pedal: When the driver steps on it, valves open and air is released from the tanks into the brake chambers.
-
Brake Chambers: These are the “muscles.” They take the force of compressed air and turn it into mechanical push to apply the brakes.
-
Slack Adjuster and Pushrod: The chamber’s pushrod moves the slack adjuster, which then presses the brake shoes against the drum.
In short: driver steps → air moves → chamber pushes → truck slows.
For a rookie, the key takeaway is this: brake chambers are the heart of the air brake system. Without them, 80,000 pounds of steel has no way to stop.
The Two Faces of Brake Chambers
Not all brake chambers are created equal. To the beginner’s eye, they all look like round steel cans bolted to axles. But there are two very different kinds:
Service Brake Chambers
-
Found on steer axles and some trailers.
-
Simple design: a diaphragm that moves when air enters.
-
Safe to open if you ever had to, no hidden surprises.
Think of these like a balloon in a can. Air inflates the balloon, pushes a rod out, brakes apply. Air bleeds out, brakes release. Safe and predictable.
Spring Brake Chambers
-
Found on drive axles and trailers.
-
Do two jobs:
-
Apply parking brakes.
-
Provide emergency braking if air is lost.
-
Hide a massive coil spring inside the back half of the can.
This spring is the monster. It’s under constant compression, waiting to slam forward if air pressure drops. That’s good for stopping runaway trucks. But for technicians, it’s a built-in hazard. If you ever open that chamber without caging the spring, you’re unleashing stored energy that can tear through bone and steel.
👉 For rookies: Service chambers are safe balloons. Spring brake chambers are bear traps hidden in cans. Learn to tell them apart, your life depends on it.
Why Brake Chambers Are So Dangerous
Here’s where the risk gets real.
-
The spring inside a spring brake chamber is compressed with up to 2,000 pounds of force.
-
The clamp ring holding the two halves together is the only barrier.
-
If that ring comes loose without caging, it can launch across a shop or roadside at lethal speed.
Accident reports tell the story. OSHA has documented cases where techs lost eyes, arms, or their lives by skipping the caging step. In one case, a clamp ring flew across a bay and struck a worker in the chest, killing him instantly.
On the roadside, the dangers are multiplied: poor lighting, rushing traffic, and pressure from dispatch and drivers to “get it done quick.” That’s when shortcuts tempt rookies and when tragedies happen.
The Golden Rule: Cage Before You Wrench
So how do you tame the monster inside the can? With a caging bolt.
Every spring brake chamber comes with one, a long threaded rod usually clipped nearby. Its job is to compress and lock the spring safely before you touch the clamp ring.
Here’s the step-by-step, written for someone who’s never seen it:
-
Locate the caging bolt. It’s often stored on the chamber itself.
-
Insert the bolt into the caging port. This hole is designed for it.
-
Tighten with a wrench. Slowly compress the spring until it’s fully seated.
-
Verify lock. Make sure the spring is secured before removing any fittings or rings.
Think of it like putting the safety pin back into a grenade. Once it’s pinned, you can work. Without it, you’re gambling with your life.
Roadside Realities
Now let’s put this knowledge into a real-world scene.
You’re called to a truck stop at midnight. A tractor is parked awkwardly near the pumps, unable to move. The driver says the brakes are locked. You slide under and spot a rusted spring chamber, clamp ring already flaking.
Traffic rolls by. The driver hovers, muttering about lost time. Dispatch pings your phone. You’re tired, cold, and tempted to grab your impact and “just pop it off.”
Stop. Breathe. This is the moment that separates safe techs from injured ones. Every seasoned road tech knows that no delivery, no deadline, no angry driver is worth losing your eyesight or your arm.
So you cage the spring. Then you replace the chamber with a new, rated unit. Then you torque everything to spec, recharge the system, test the pushrod travel, and only then sign off.
That’s professionalism. That’s survival.
Common Mistakes Rookies Make
-
Skipping the Cage
-
The “it’ll only take a second” shortcut.
-
One second is all it takes for disaster.
1. Standing in Line with Clamp Rings
-
Always work from the side.
-
Never put your face or body in front of a ring.
2. Using Impacts to Spin Off Rings
-
Fast, yes. Safe, no. Impacts remove control.
3. Rebuilding Chambers Roadside
-
Never. Always replace with a new unit.
4. Mixing Chamber Types
-
A short-stroke on one side, a long-stroke on the other = DOT violation.
What the Law Says
The Federal Motor Carrier Safety Administration (FMCSA) and DOT inspectors watch brake systems closely because they’re the leading cause of roadside out-of-service orders.
Inspectors check:
-
Pushrod stroke length. Too long = out of adjustment.
-
Chamber condition. No cracks, leaks, or rust.
-
Matching types. No mixing on the same axle.
-
Emergency function. Spring brakes must work if air is lost.
For techs, this means your work isn’t just about safety, it’s about compliance. A sloppy chamber job can cost fleets fines and downtime.
Real-World Story: The Rookie’s Lesson
A new road tech in Michigan was rushed on his first solo call. The driver complained of locked brakes, and the tech spotted a failed chamber. Eager to prove himself, he grabbed his gun and went for the clamp ring.
He never caged the spring.
The ring exploded off, hitting him square in the chest. He survived, barely, with broken ribs and permanent damage. His career ended that night.
Ask any veteran tech, and they’ll say the same thing: Don’t become that story. Cage it.
Final Takeaway
Brake chambers don’t look like much, just round cans under a truck. But for road techs, they’re one of the most dangerous parts you’ll ever touch.
If you’re new, remember this:
-
Learn to tell service chambers from spring brake chambers.
-
Respect clamp rings like they’re loaded weapons.
-
Never, ever skip the caging step.
-
Replace, don’t rebuild.
-
Test every job before you sign off.
At the end of the day, this isn’t just about trucks or cargo. It’s about making it home safe after every call.